This seems a little self-gratuitous to post on here, but I spent a long time searching for inspiration on a setup for my equipment and records, so I hope more people might find it helpful if they are looking for something similar.
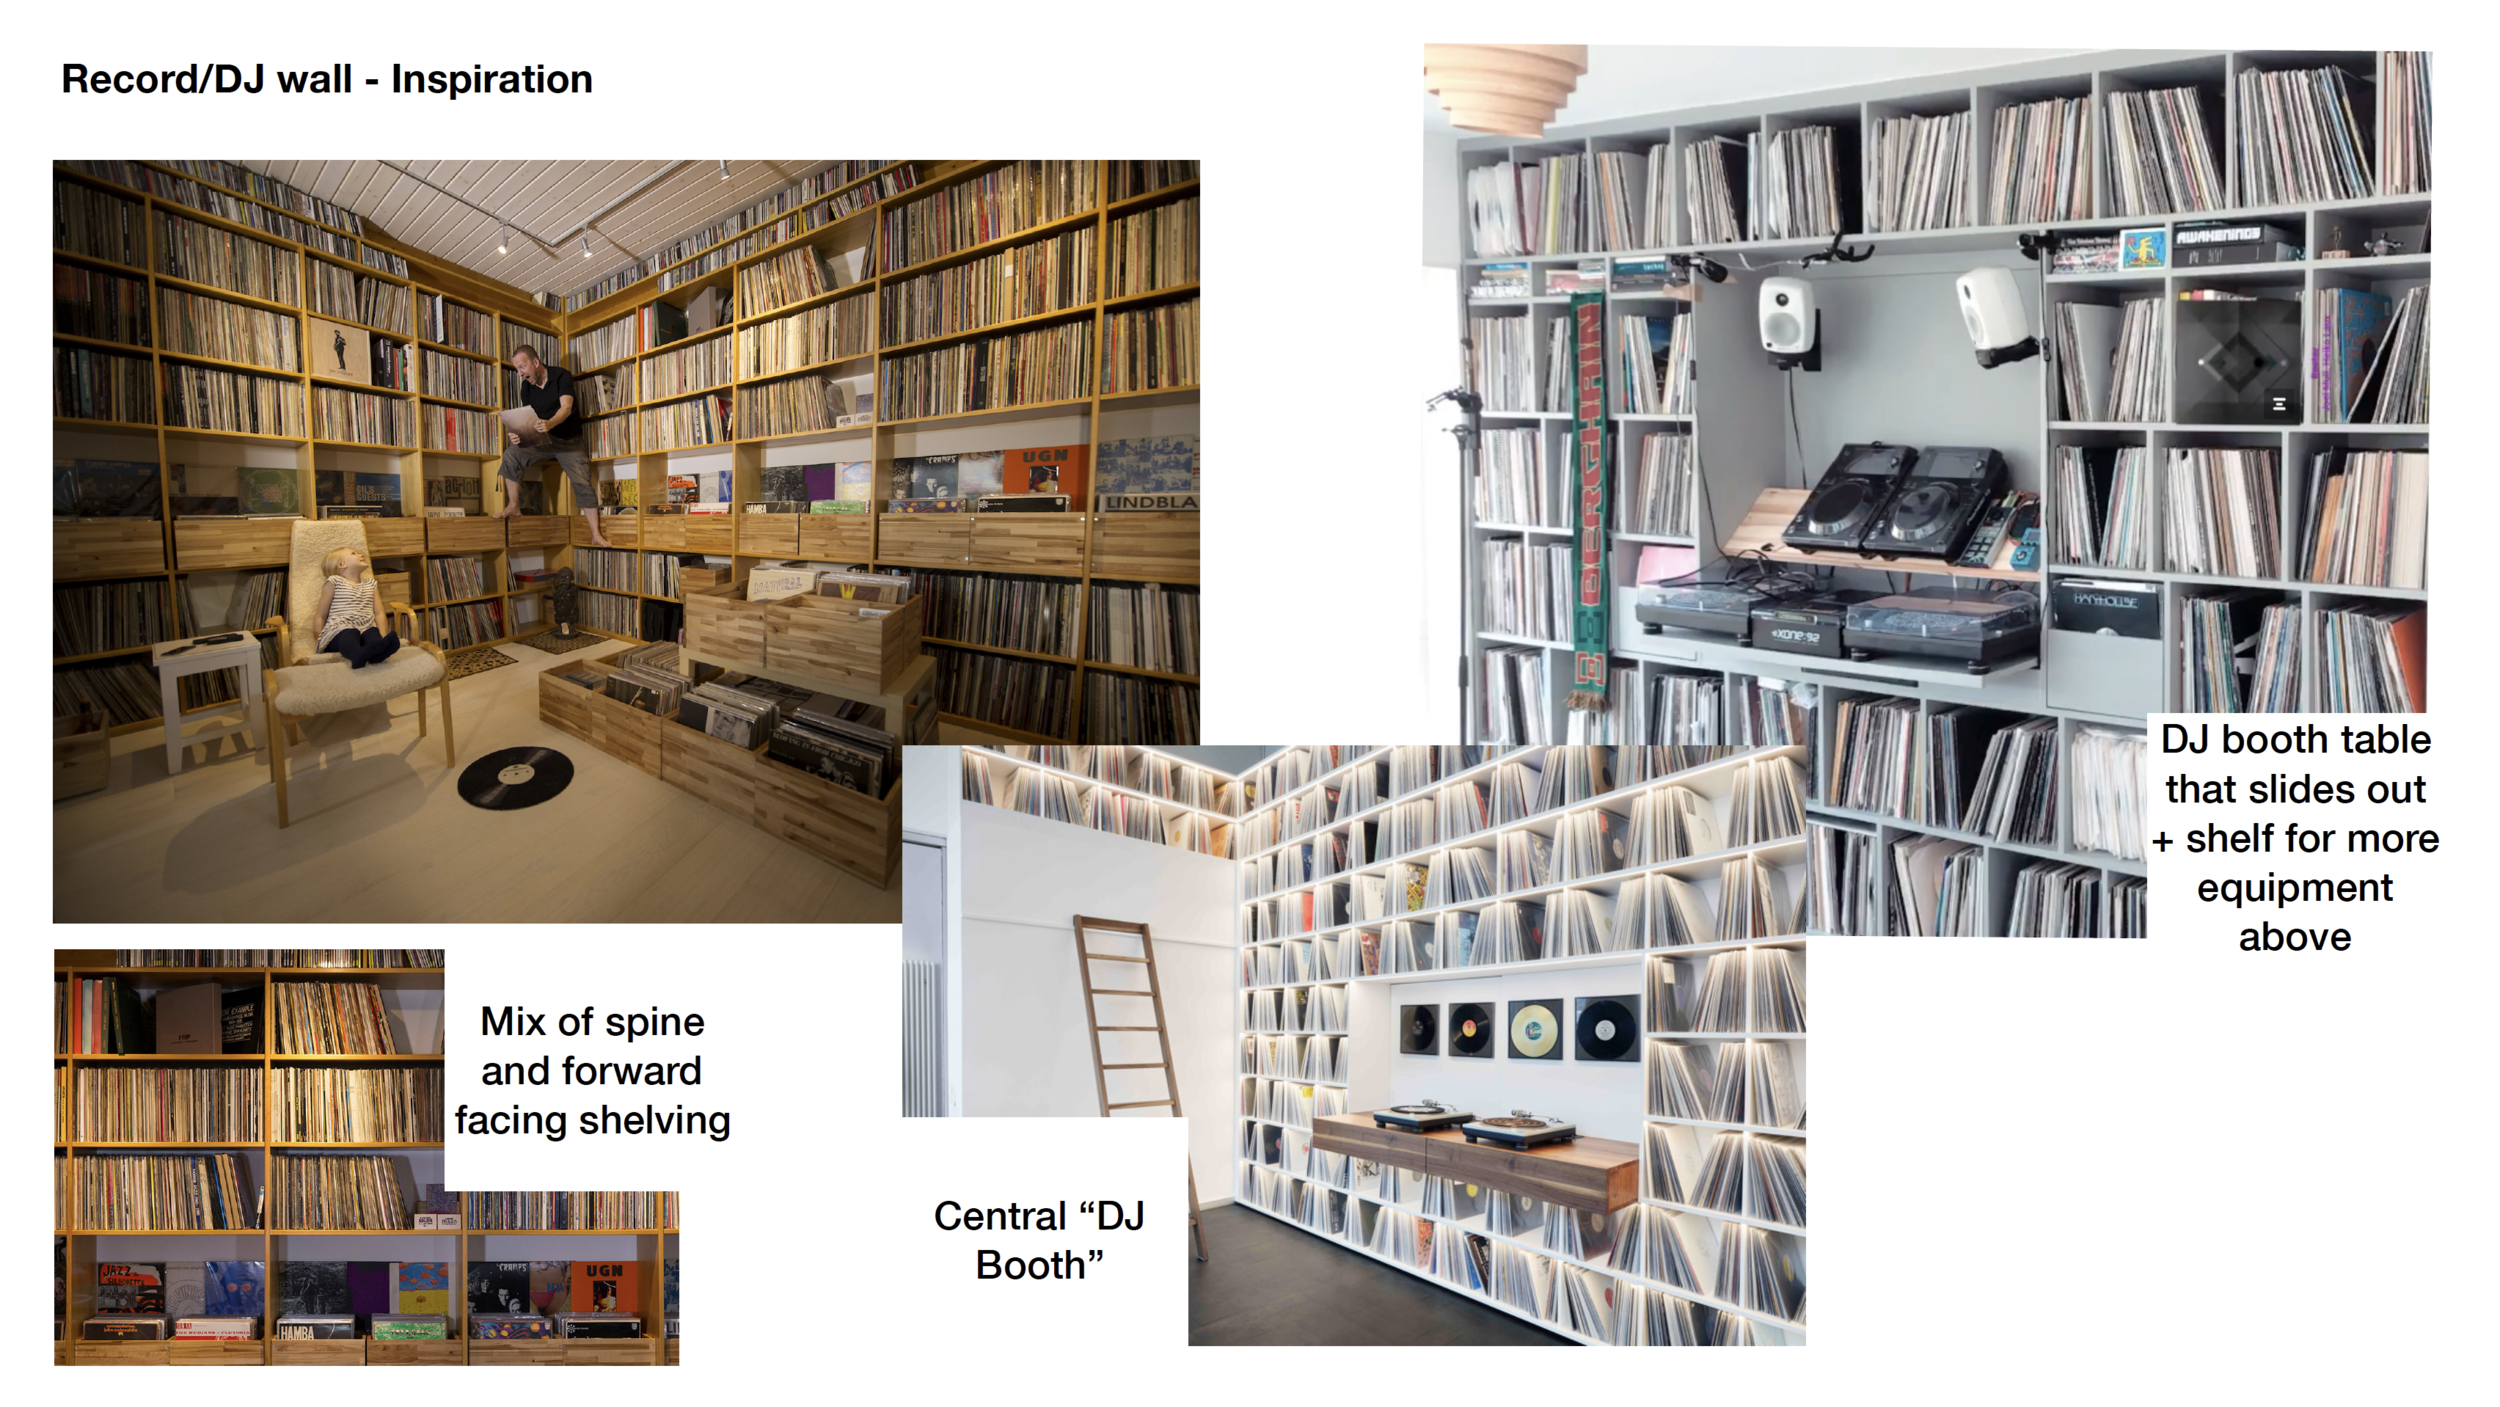
After years of trying to find the perfect solution, I have recently completed the bulk of my dream “DJ” setup. It took me a while to decide whether I wanted a full wall of records, or to incorporate the equipment somehow, and it wasn’t until I saw something similar from my friend Joel Mull (ASIP Artist, Damm) that I decided to do both.
Before this, I was looking at a myriad of potential shelving solutions to fit the room. I needed something as custom as possible to maximize the space, and a few key negotiables.
At first, I looked at Rakks, which is extremely modular, but ended up being expensive and not the ‘natural’ look I had hoped for. I also entertained Vitsoe (designed by Dieter Rams), which is similar to the more popular Floyd Shelving System (whom Ghostly have a collab version with) but then started to see the price tags... Additionally, all three sit within the same realm but rely on certain dimensions to an extent. So either way, I would’ve ended up leaving space against the wall at some point. But if industrial is the look you are going for out of the box, these are probably your best bet.
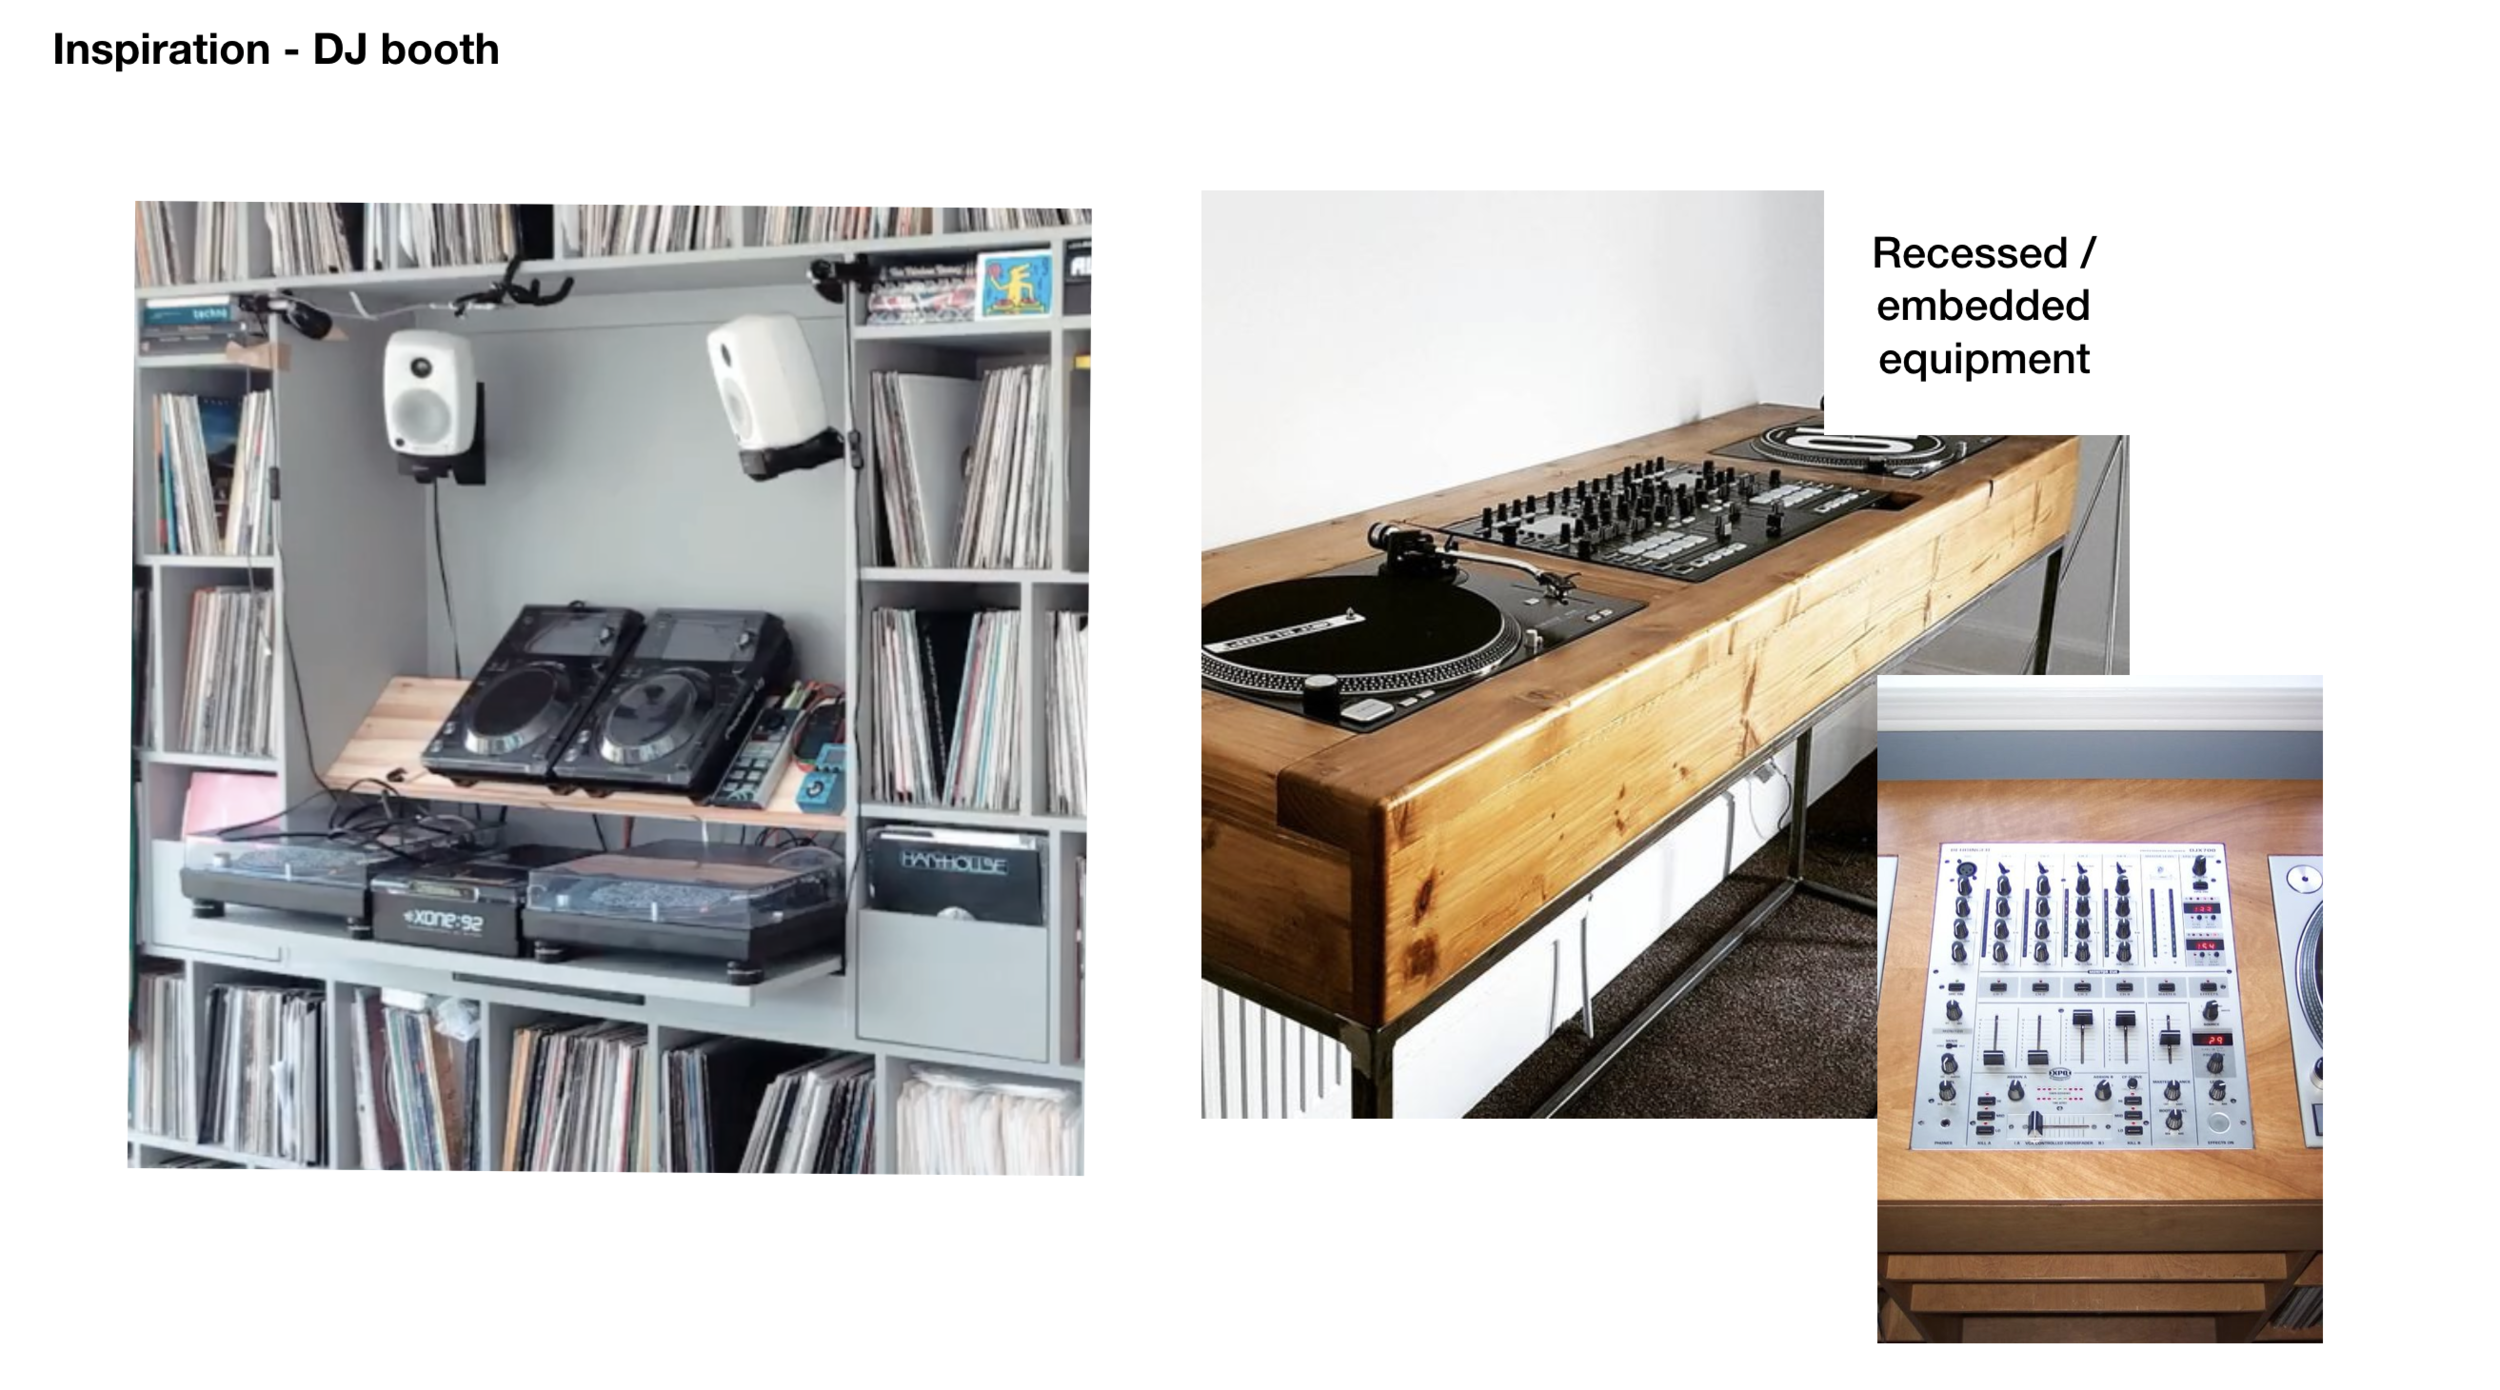
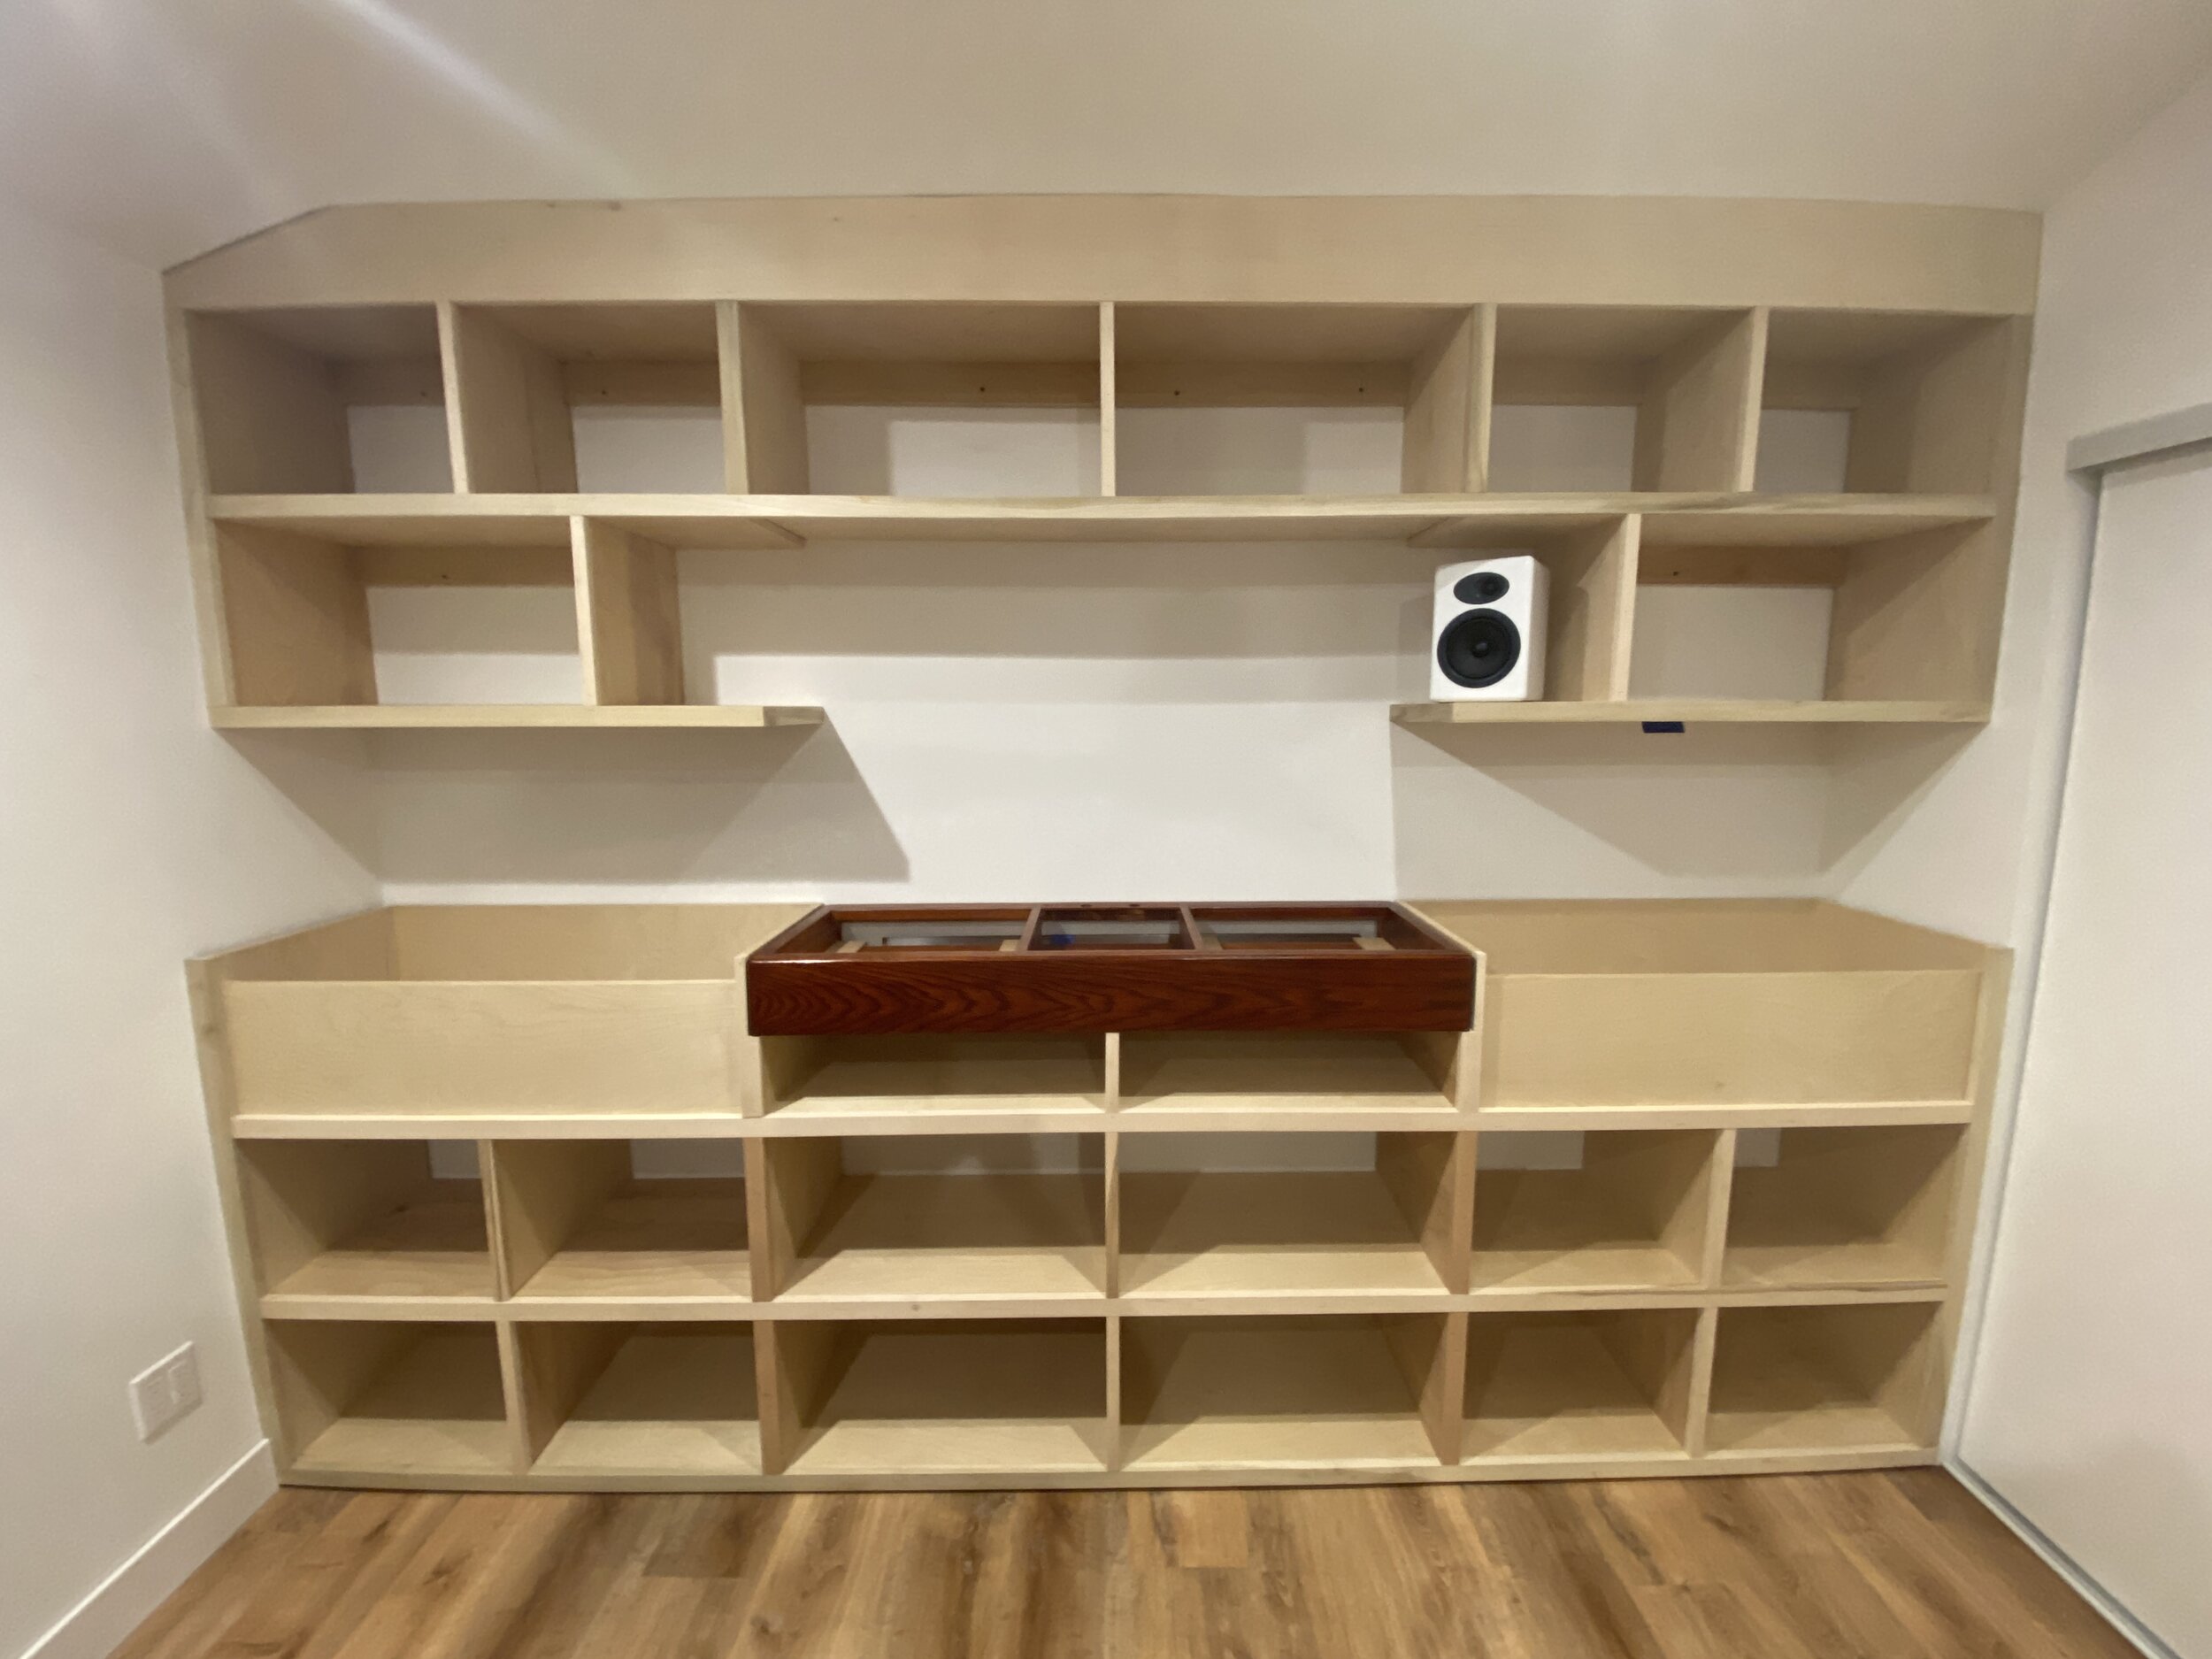
Once I had decided that the wall space needed to incorporate my equipment (I had entertained building a separate island in the middle of the room at one point) I decided that my ‘dream’ scenario was too custom for the above shelving systems. I had a few must haves (otherwise I’d be sticking with my Ikea Kallax for another lifetime):
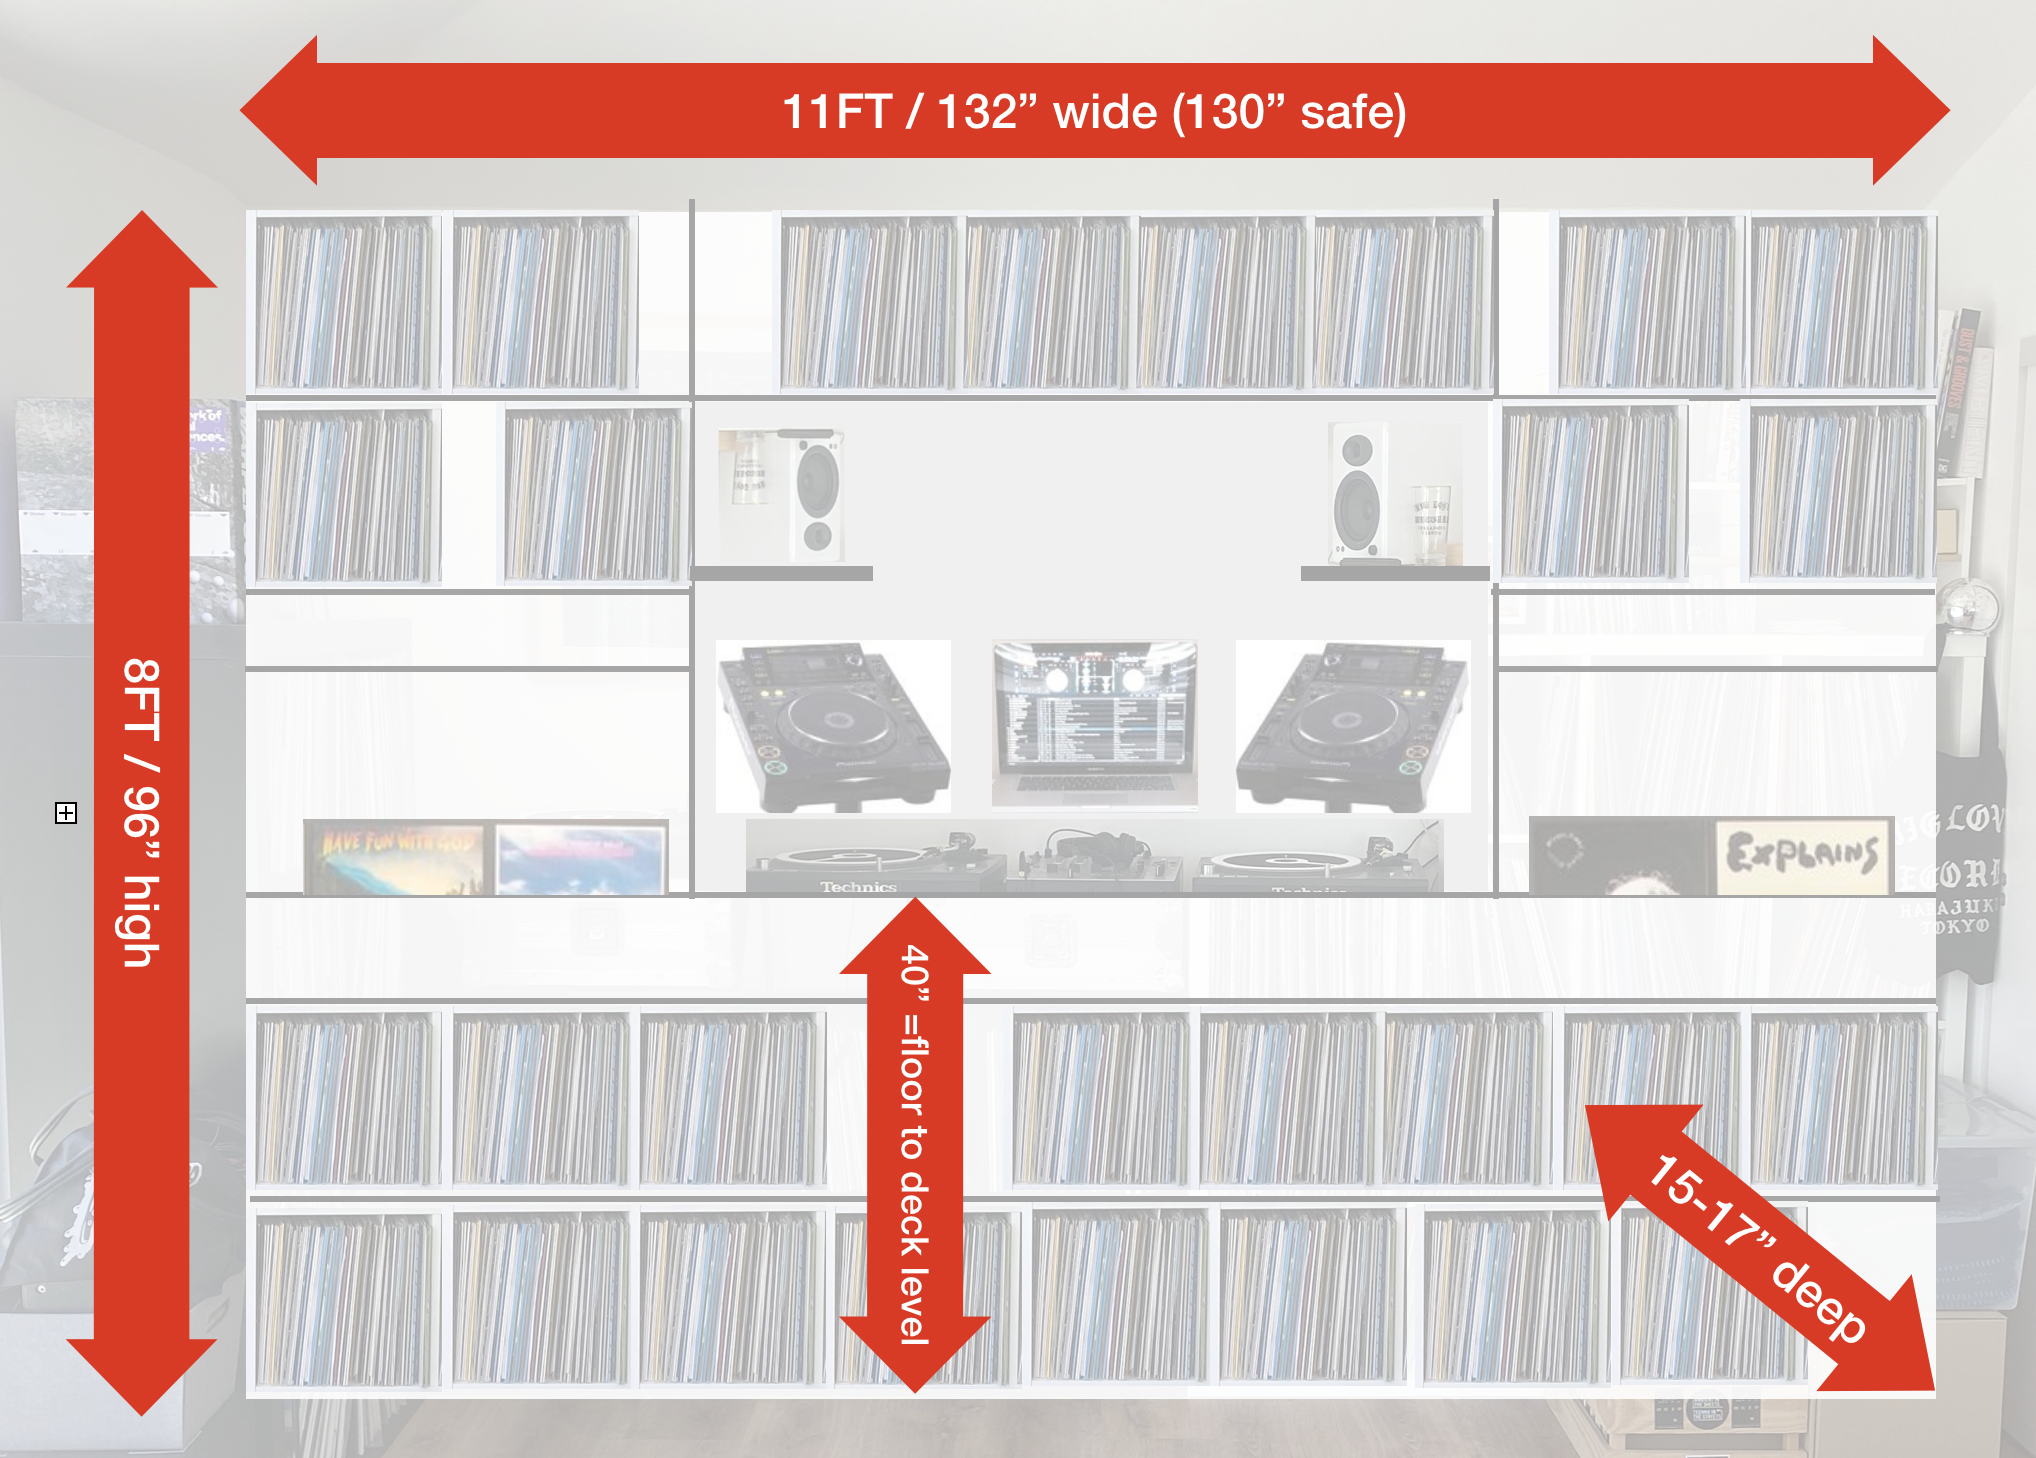
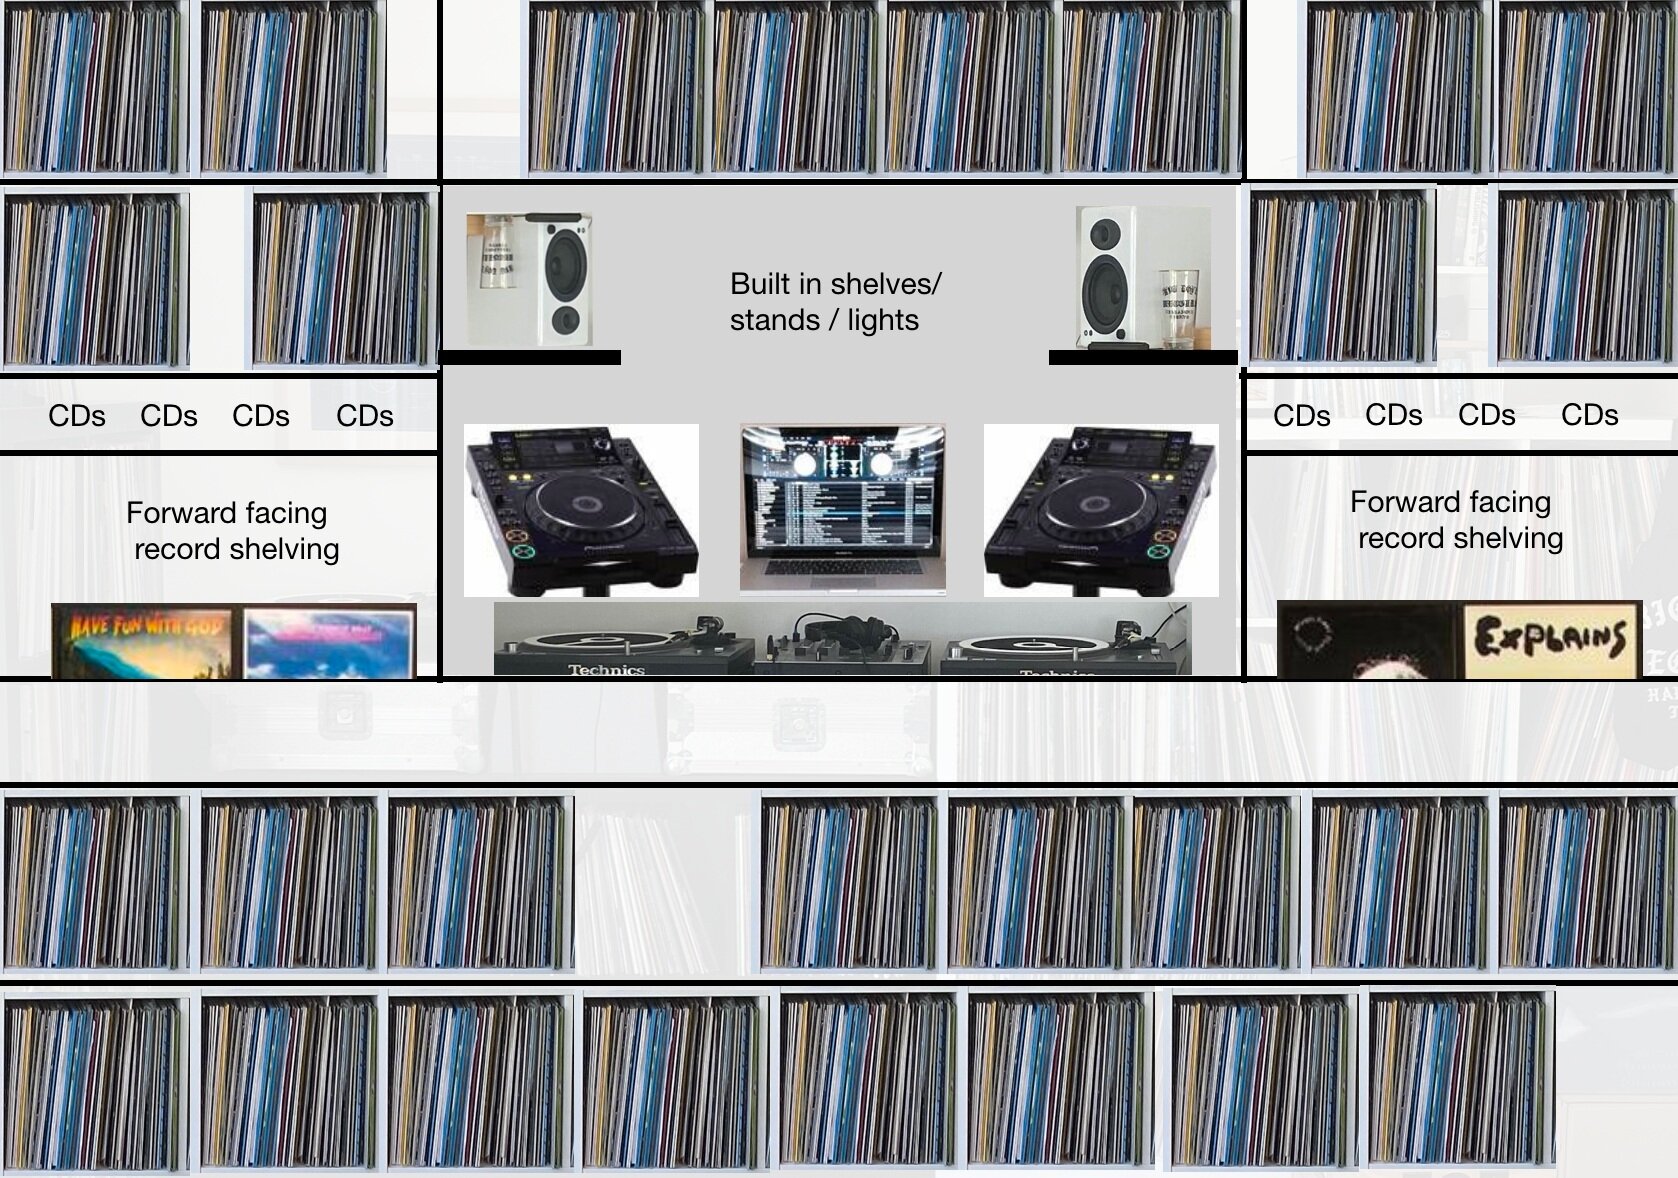
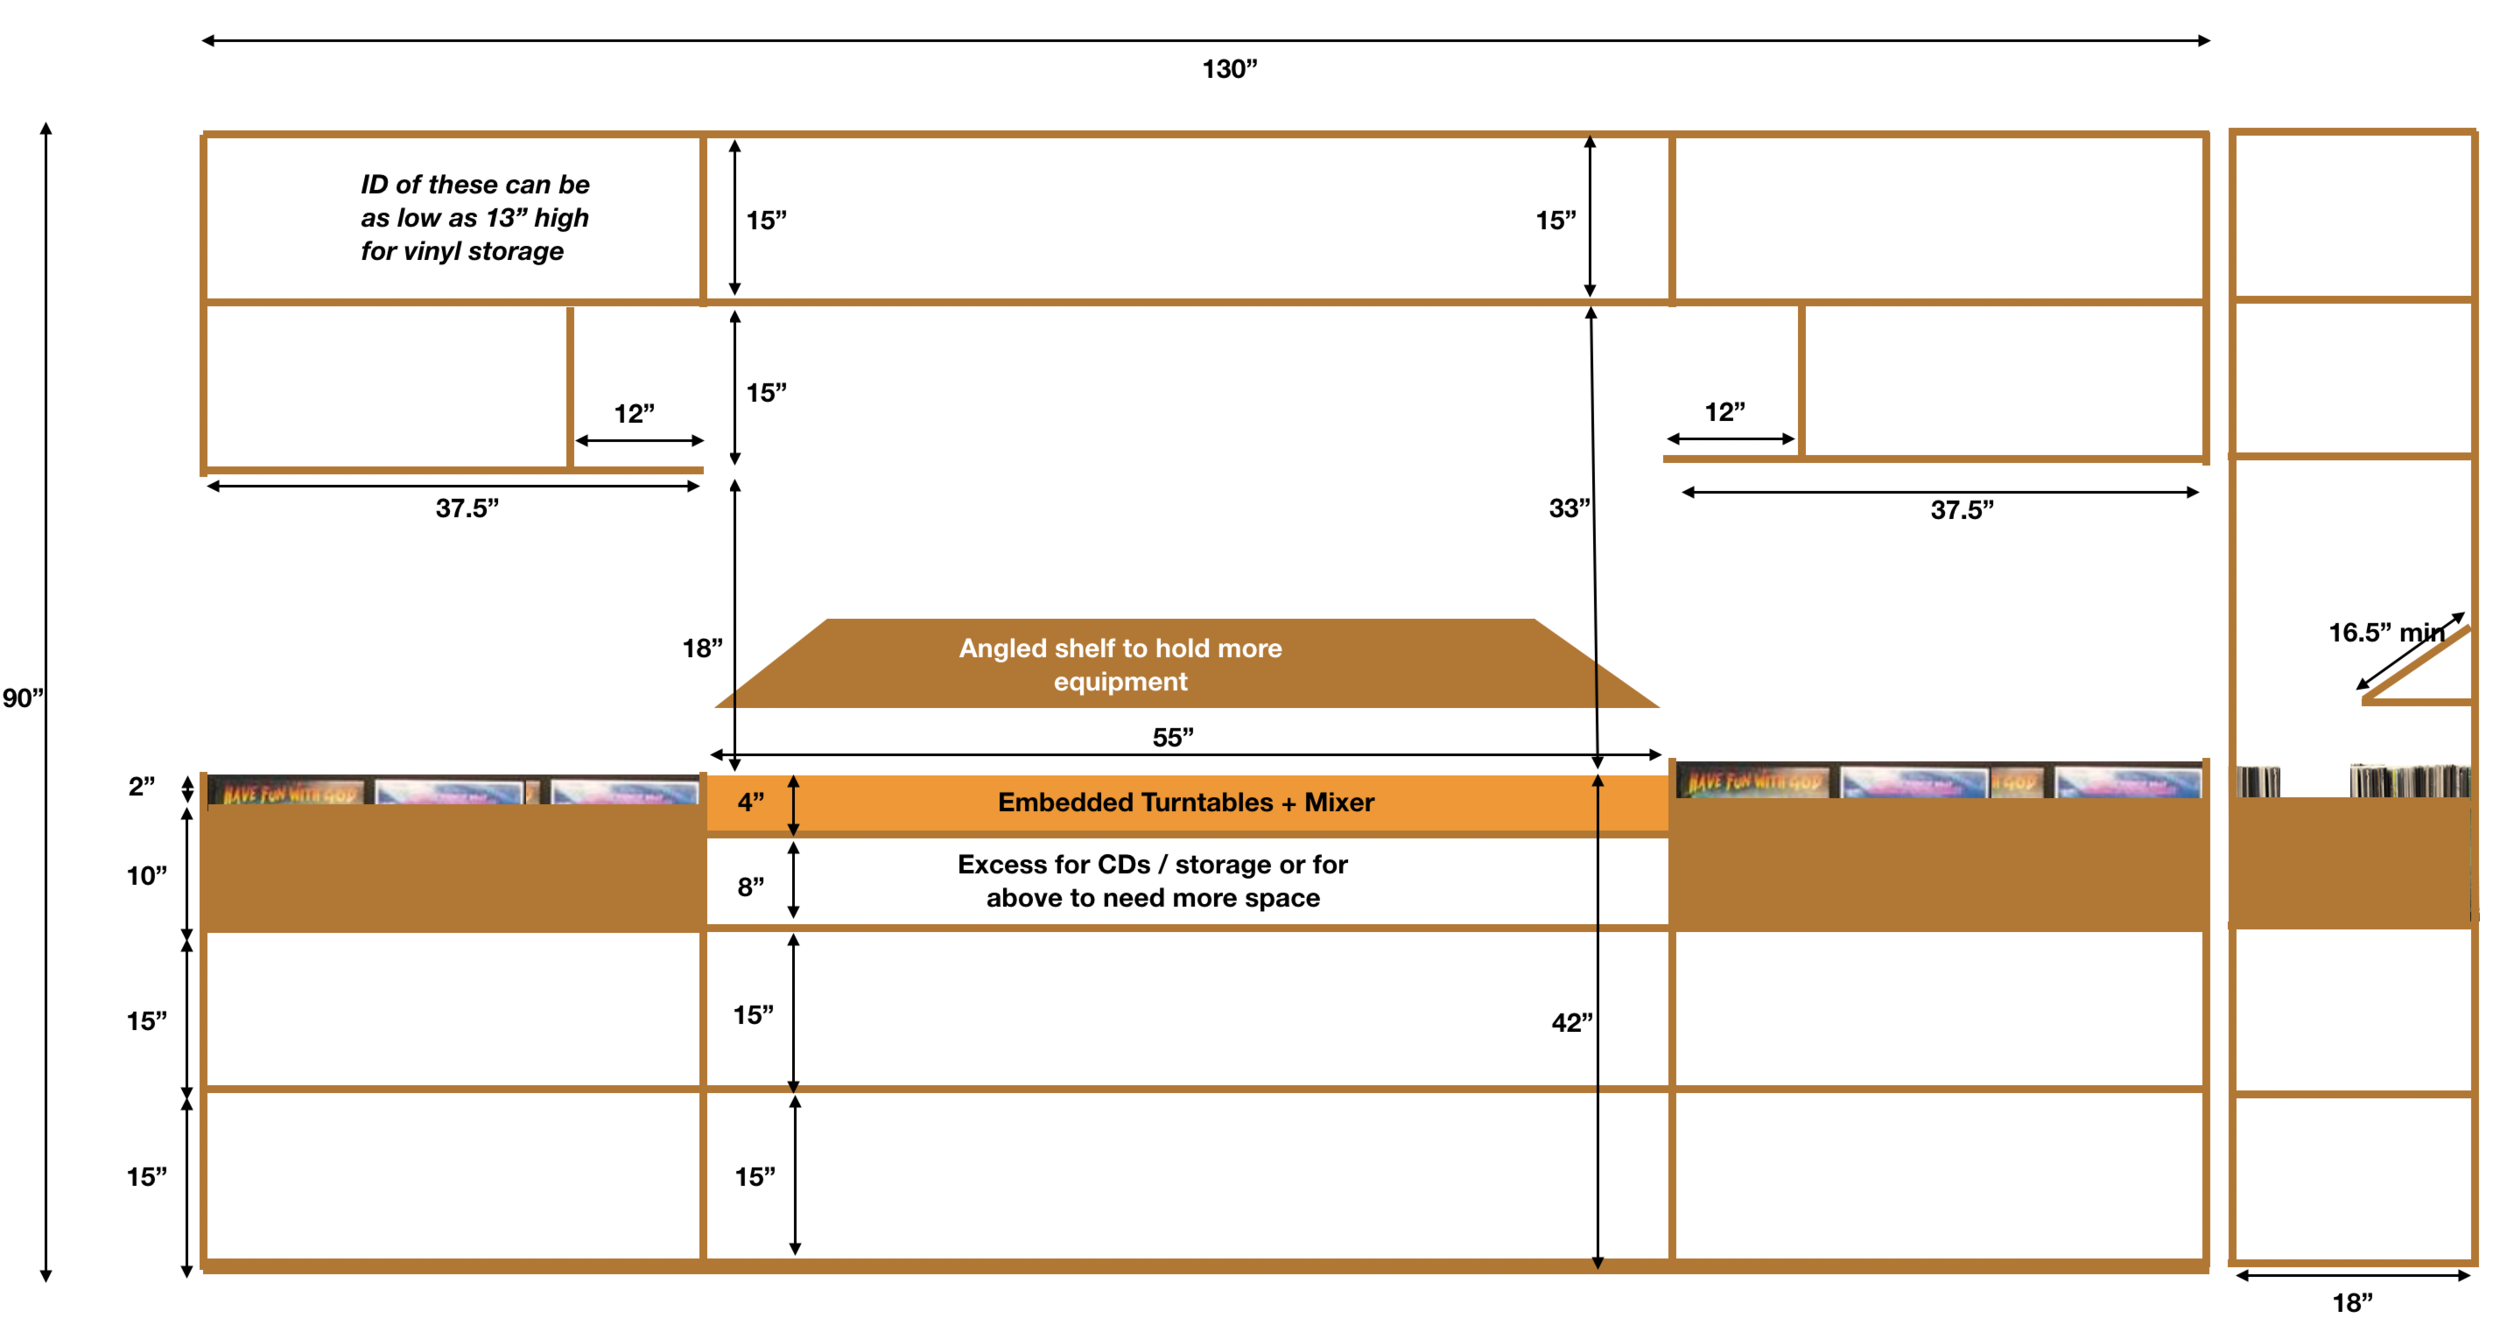
An ear-height monitor shelf.
A drawer, or option to tuck my turntables - so not only can my feet place underneath to help with my back, but to maximize space.
A diagonal-placed shelf for CDJs + laptop (which even works as a record display)
And the biggest missing component from out-of-the-box shelving systems- record store style forward facing “bins”… after years of flicking through albums sideways at home, any vinyl collector will likely attest to how much more enjoyable it is to flick through records front-facing - with artwork in full and that natural digger-finger in full power!
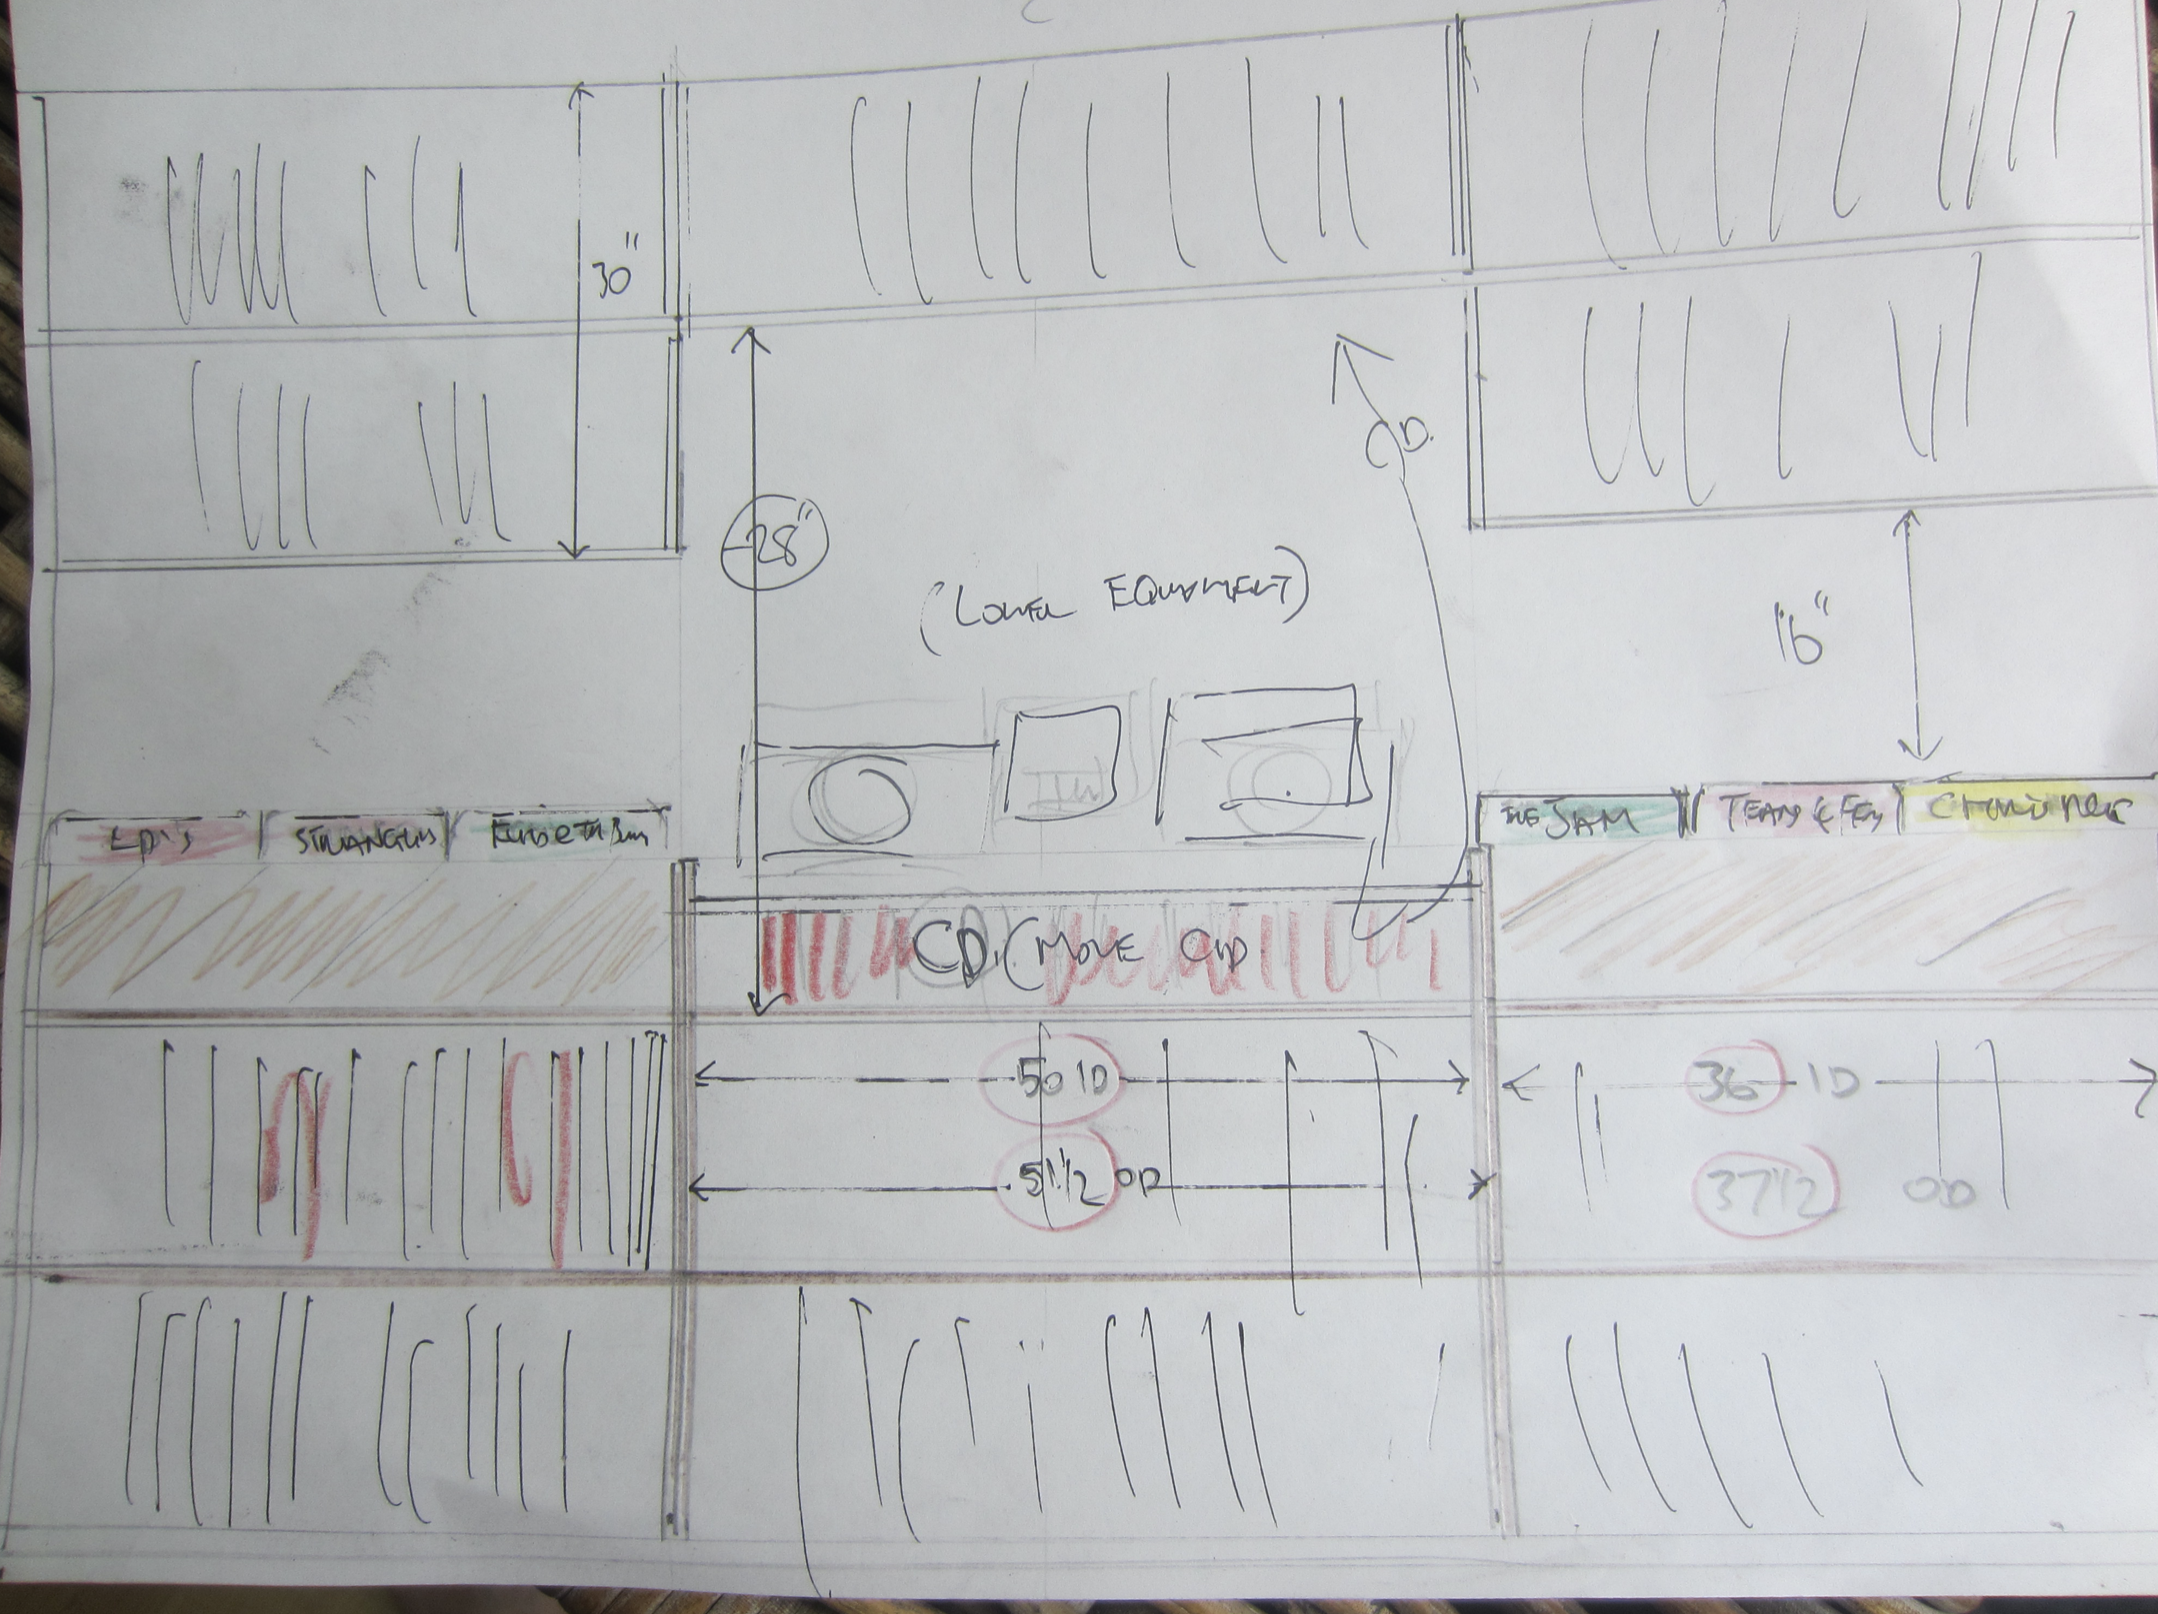
Inspiration, (bad) drawings in keynote, and shots of works in progress

So I started looking for a woodsman/ carpenter to build it from scratch and luckily I found just the man, Mike - ( I’m happy to share his details if you get in touch).
The shelving sections came together quite easily according to Mike - basic shelving cut to requirements, but it was the turntable drawer that was yet to be worked out…
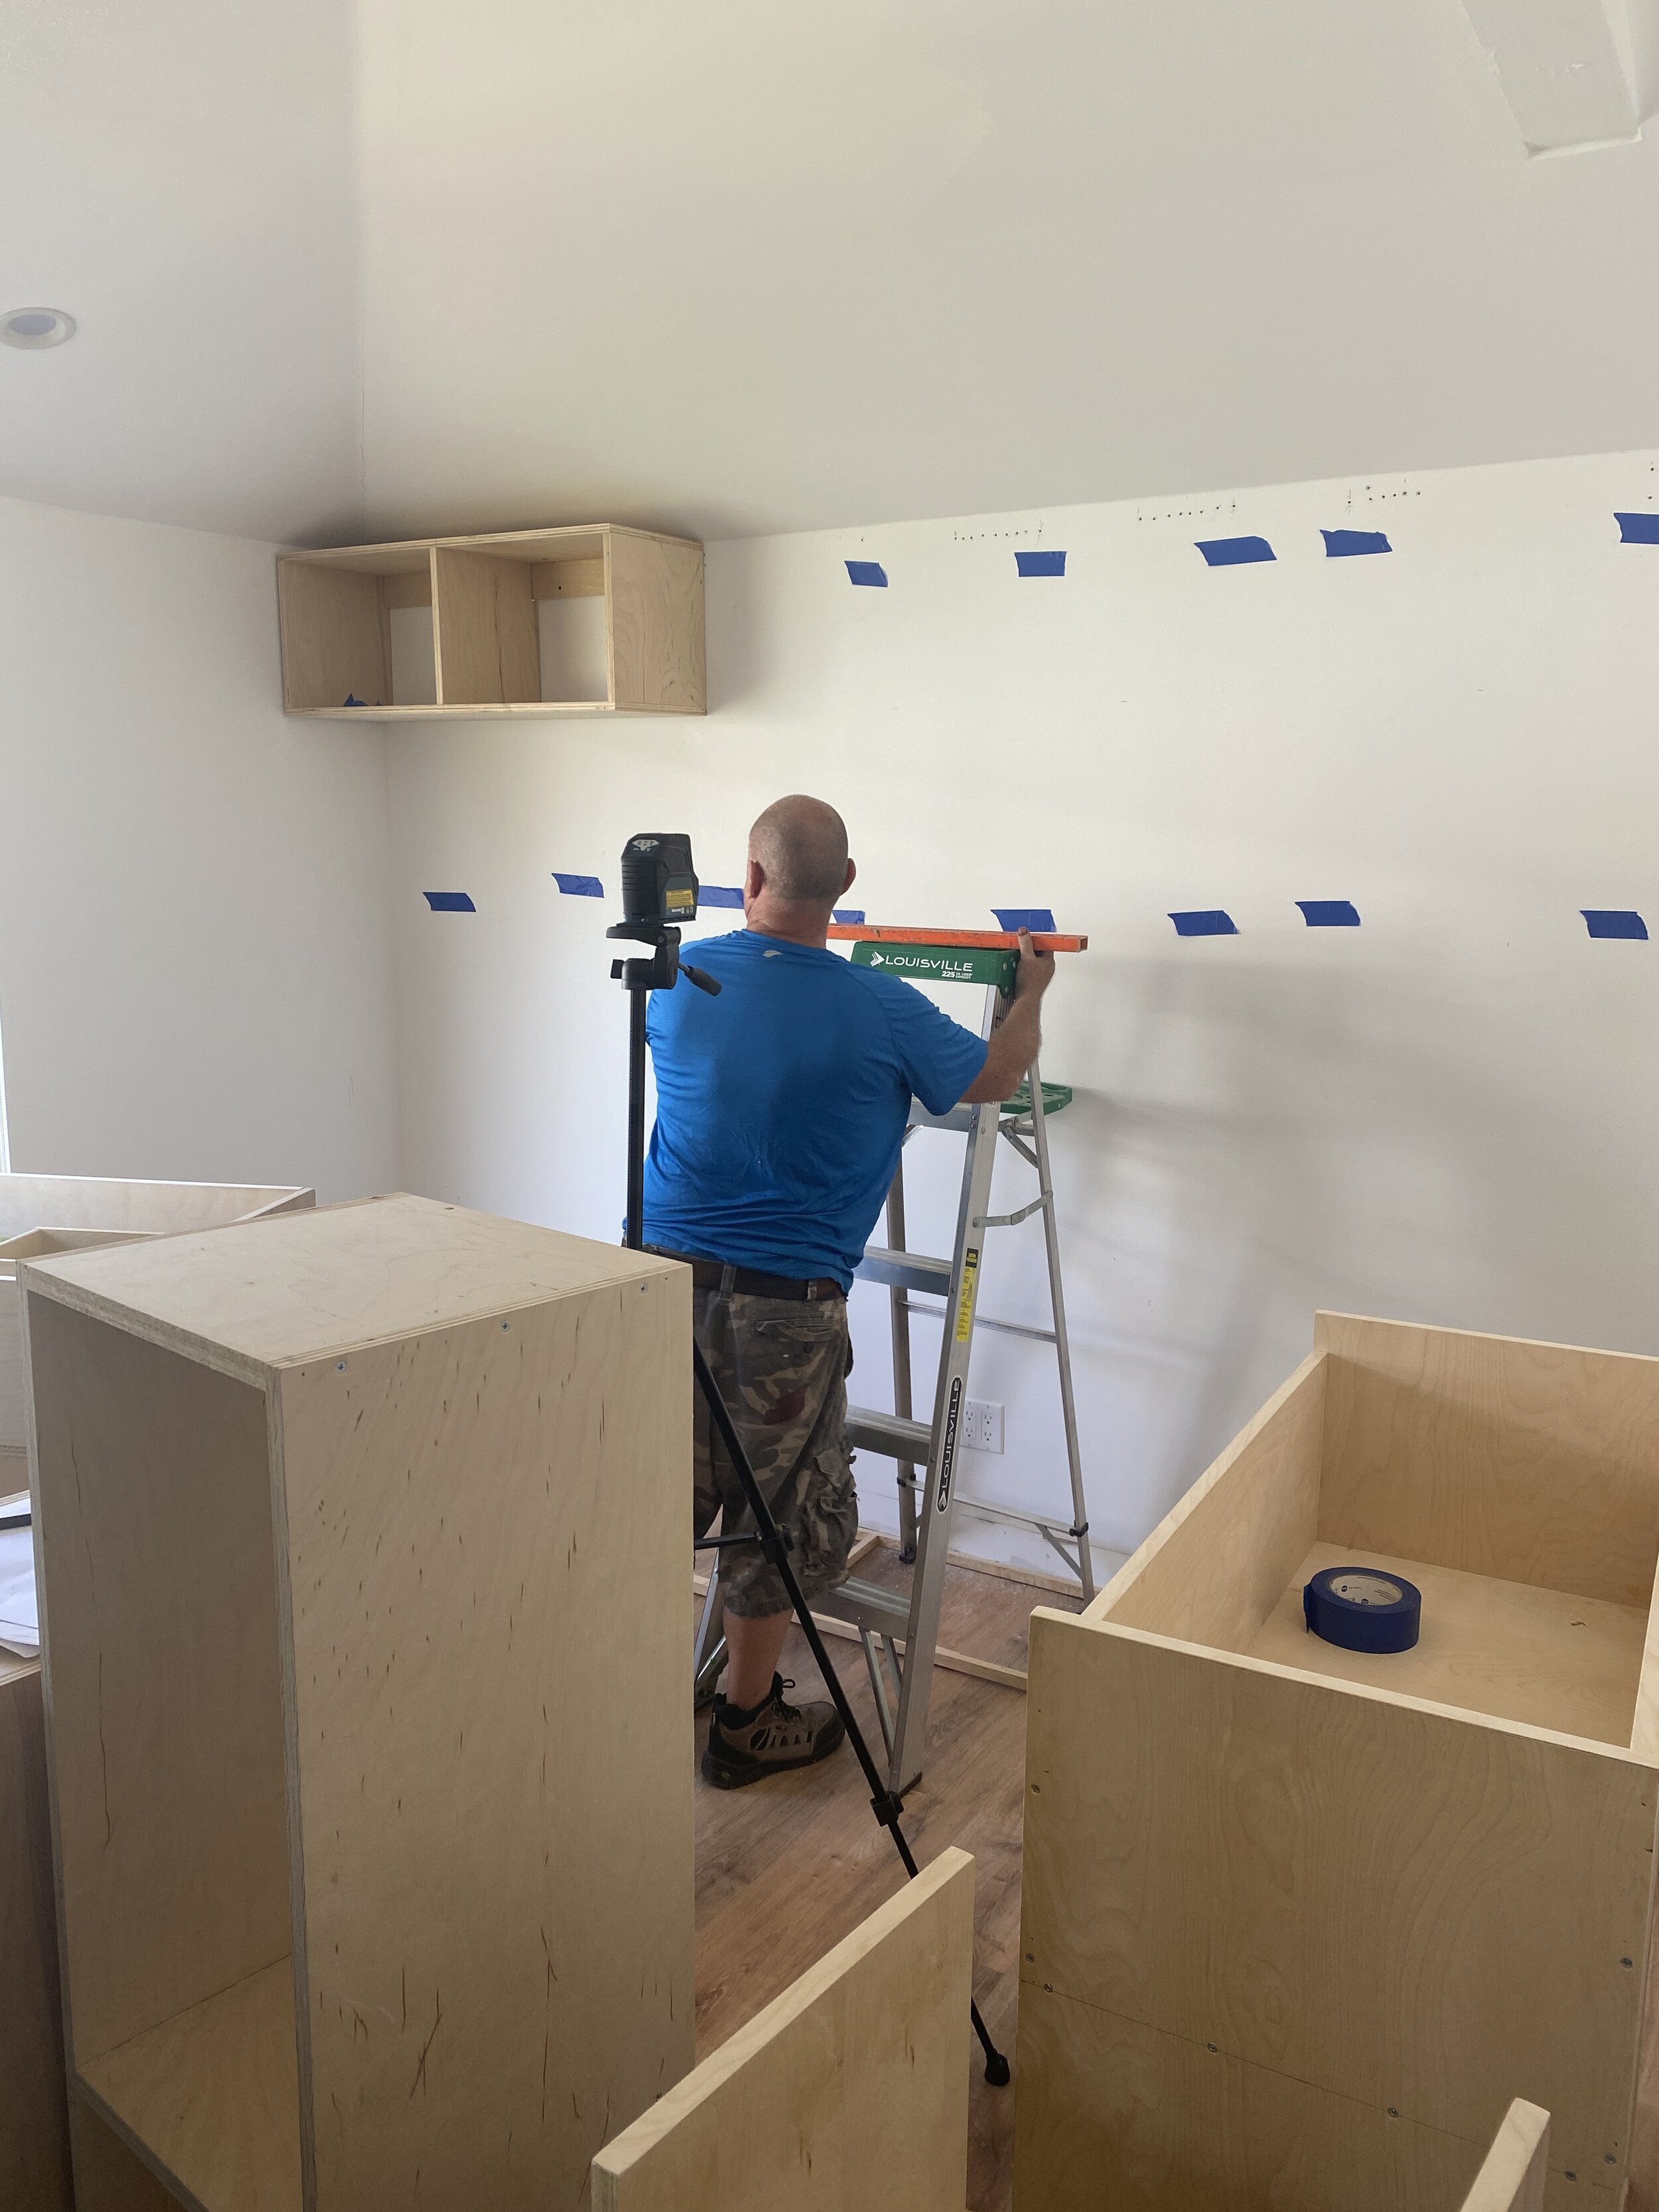
Once the 4 main sectional shelving units were created (left bottom, right bottom and two top), they were installed (without the turntable draw or CDJ shelf). At this point, I painted the shelves white (another big decision, after debating leaving them a natural wood color).
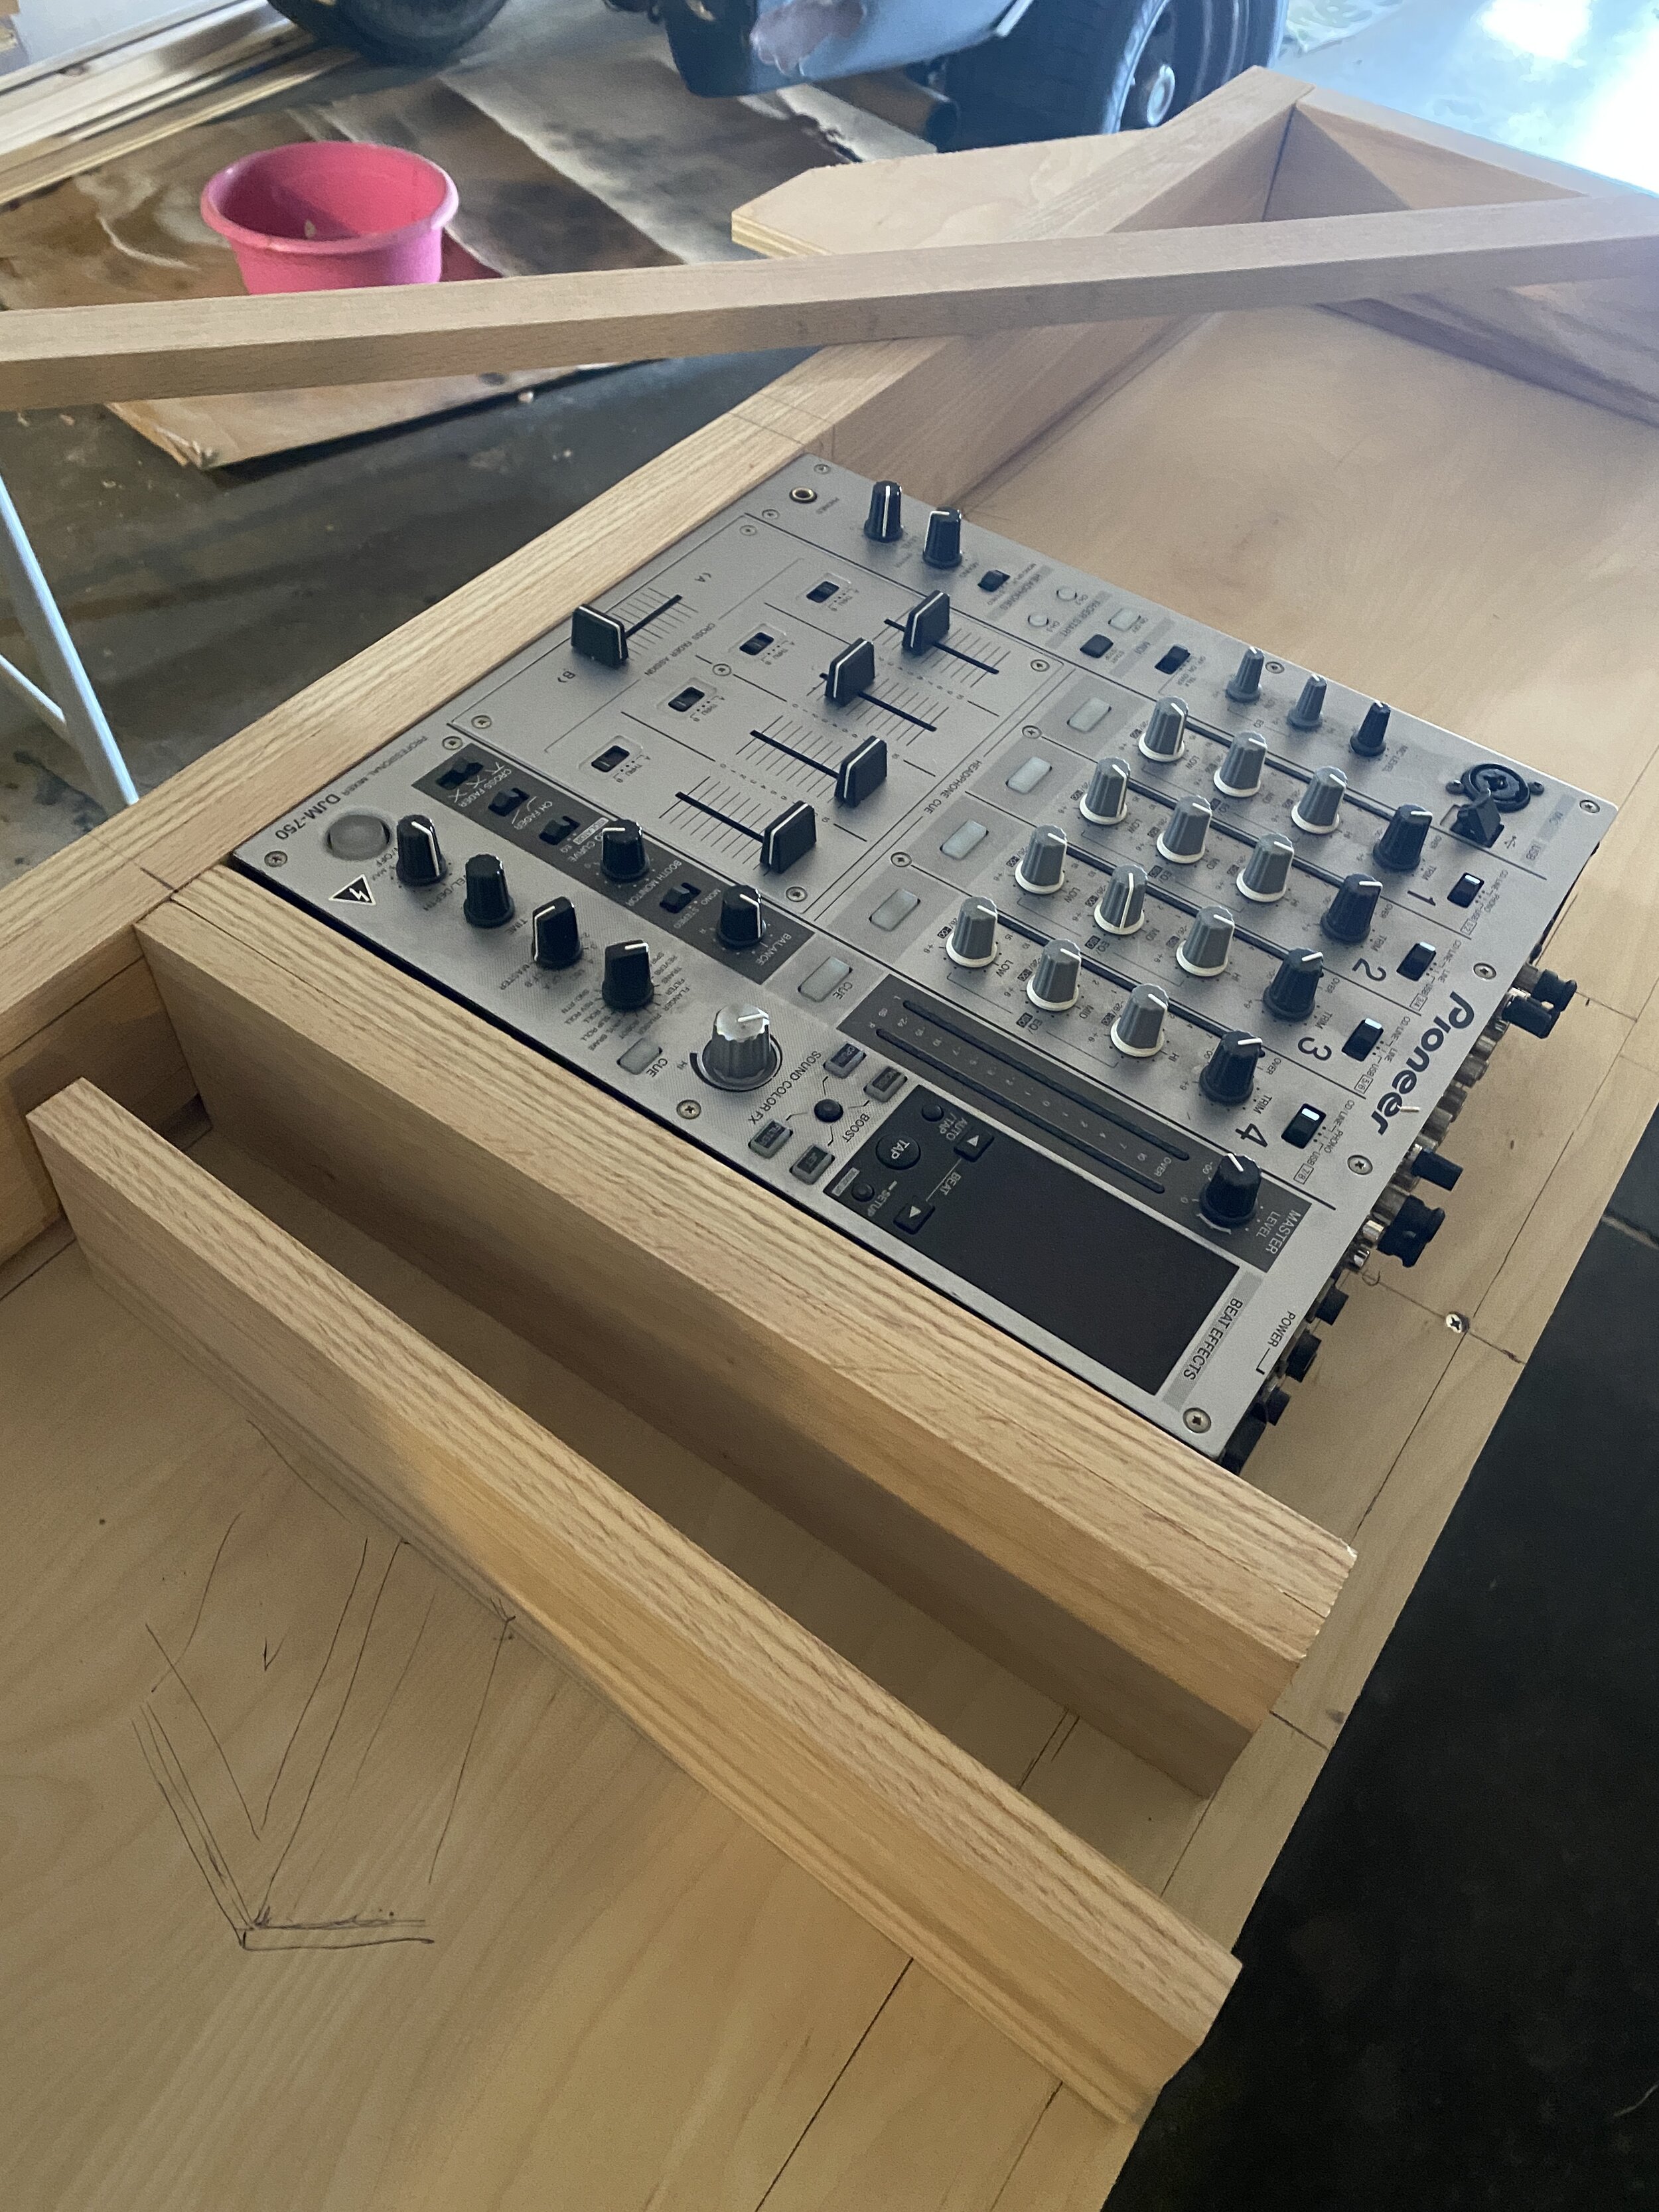
Mike then attacked the turntable drawer, using solid pieces of Oak and joining without screws to keep the seams and exterior sides smooth and feel like one solid chunk of wood. Mike had my equipment to hand to make the recessed sections perfectly, but what we hadn’t worked out yet was how it a) all fitted together with sprawling cables out of the back b) how far it had to pull out to give enough clearance once all in place and c) the final stain/ color of the draw.

Turntable Drawer up close (mid-blend!)
Color was decided first, after debating a black stain, or matching the lighter oak wood floor - I wanted something that contrasted with the white, yet felt natural and homely, so opted for a ‘Trans Red Oxide’ stain which I liked the sound of as well as nailing the desired effect. Once we had it stained and all the shelving painted white, Mike started to install the drawer on heavy duty slides, pulling out a further 6-inches from the furthest front alignment.
With the drawer in, we hung the angled shelf which would hold the CDJs. This was hollow, to allow wires to drop through two side holes (with added desk grommets) - a decision I was later thankful for, after nearly hacking a square out of the middle to allow for access, and drilled the entire thing into the studs to ensure stability.
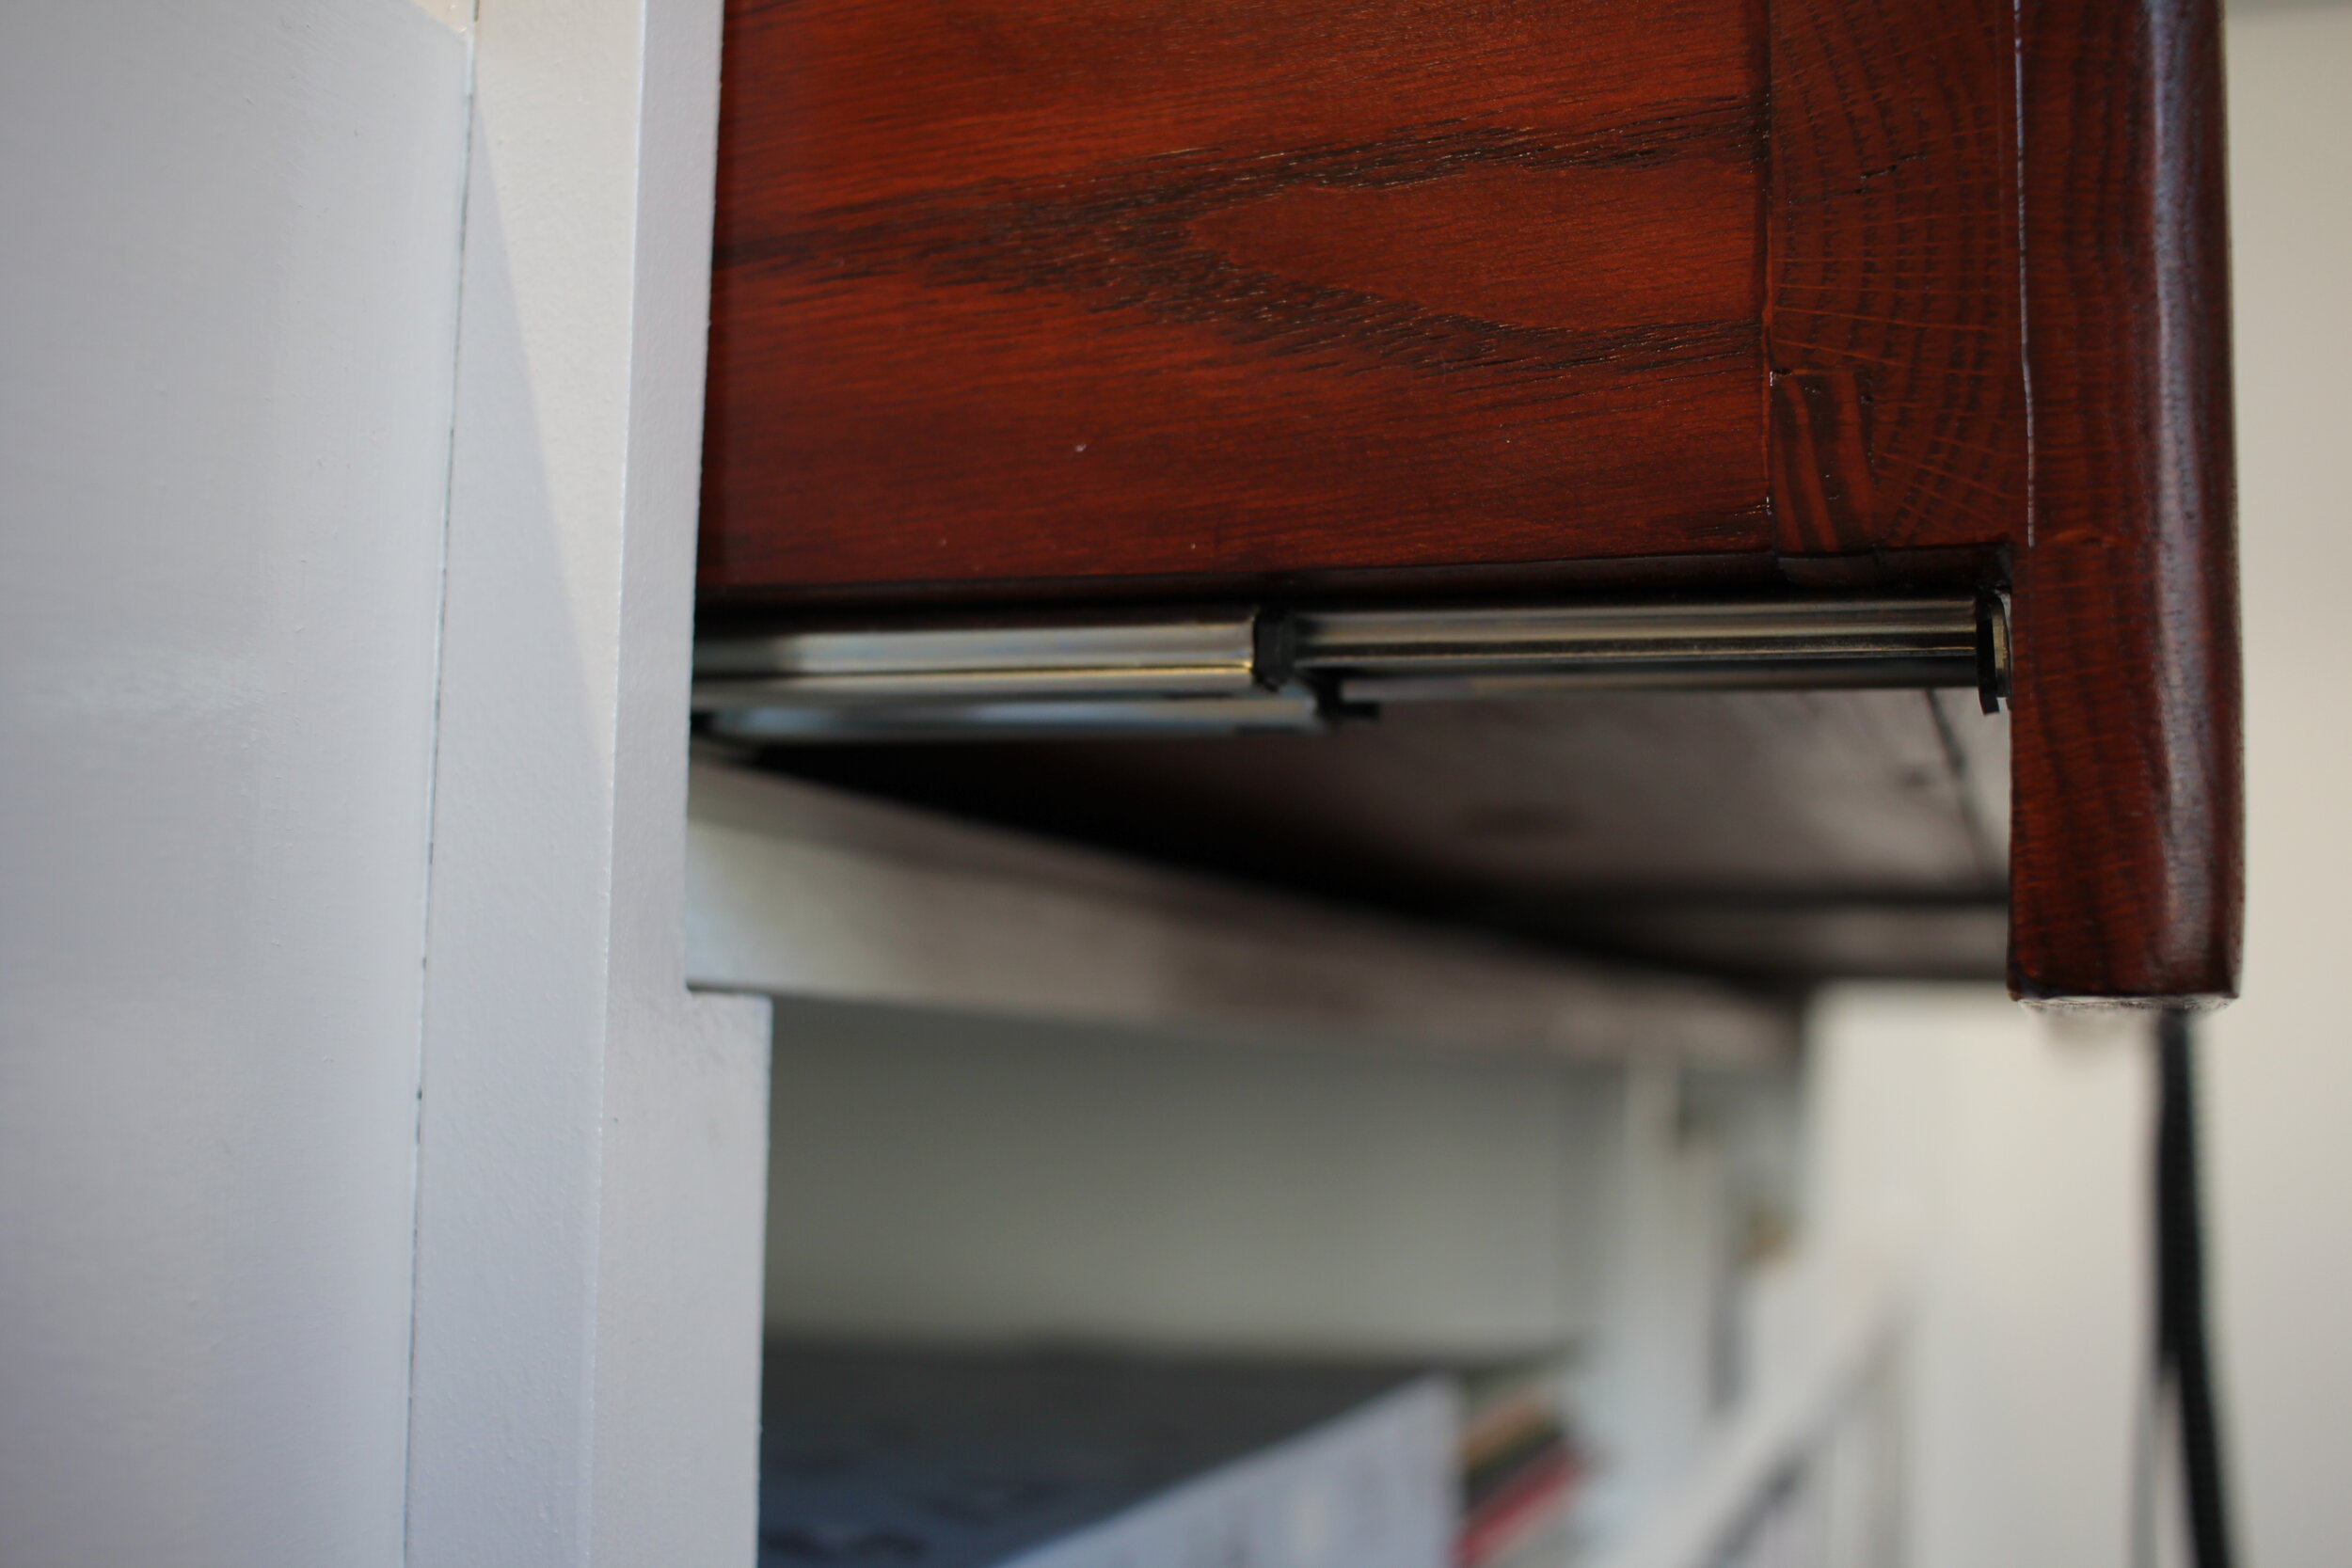
Turntable Drawer sliders
Time to install the equipment.
After dropping in the turntables and mixer and pinching my fingers numerous times, I quickly found out the myriad of cables out the back did not have enough clearance - especially because the angled shelf was now installed above, it made getting back there even harder to fiddle around. So we had to remove the drawer and clear some additional notches at the back - open it up a little more.
Additionally, it was at this point we took advantage of having it out again, and added small holes under the draw - enough to get a finger through - to poke the bottom of the equipment to help leverage out again (as it was near impossible to get it out the first time due to them being flush).

The control panel
After installation, and of course after a few high-volume mixes to test it all out and make sure it didn’t fall off the walls, I started to look at the smaller details needed to add.
I’ve added cabinet lighting to the left and right record bins, and intend to add a library-style light in the central position. Then I need to attempt to tidy up the cables at the back a bit. After that, and as long as my trusty Pioneer and Technics hold up and (a flash new mixer stays at bay) I should be able to leave it be, and enjoy it to its fullest with a few friends (one day!)
A big thank you to the talented woodsman, Mike who helped fulfill my ambition and going the extra mile; Joel for his inspiration; and to my wife who helped with the grueling paint job.
Hope you enjoyed reading about the process.

Record “Bins” with added perspex dividers (and a prototype ASIP divider)

Choon.

Ready for takeoff